HomeAbout MeContact

Troubleshooting Power Automate - Non-default Environment Bug in SharePoint

Published in Power Platform
November 06, 2023
1 min read
Troubleshooting Power Automate -  Non-default Environment Bug in SharePoint

Table Of Contents

01
Introduction
02
The Challenge
03
Solution

Introduction

Have you encountered an issue in Power Automate where your instant cloud flow, triggered by “For a selected file” or “For a selected item” deployed in a non-default environment, doesn’t show up in SharePoint? You’re not alone. This known bug has been reported since January 5, 2022, and unfortunately, there have been no updates to resolve it.

The Challenge

The main problem with this bug is that if your workflow is triggered by “For a selected file” or “For a selected item,” you won’t be able to use your non-default environment to host your workflow. This limitation means you won’t have the flexibility to have separate environments for testing or development.

Solution

To address this issue, follow these steps:

Prerequisites

  1. In your SharePoint list/library, add a new column (it doesn’t matter what column type you choose, but for this guide, we will use a single-line text column).

Adding a single line column.

  1. Once the column is added, you need to edit the formatting of the column you just added.

Changing the Format of the column.

Changing the Format of the Column

  1. Click on “Advance mode.”

Advance mode
Advance mode

  1. In Advance mode, you will be able to add JSON Formatting to your column. Insert the following code::
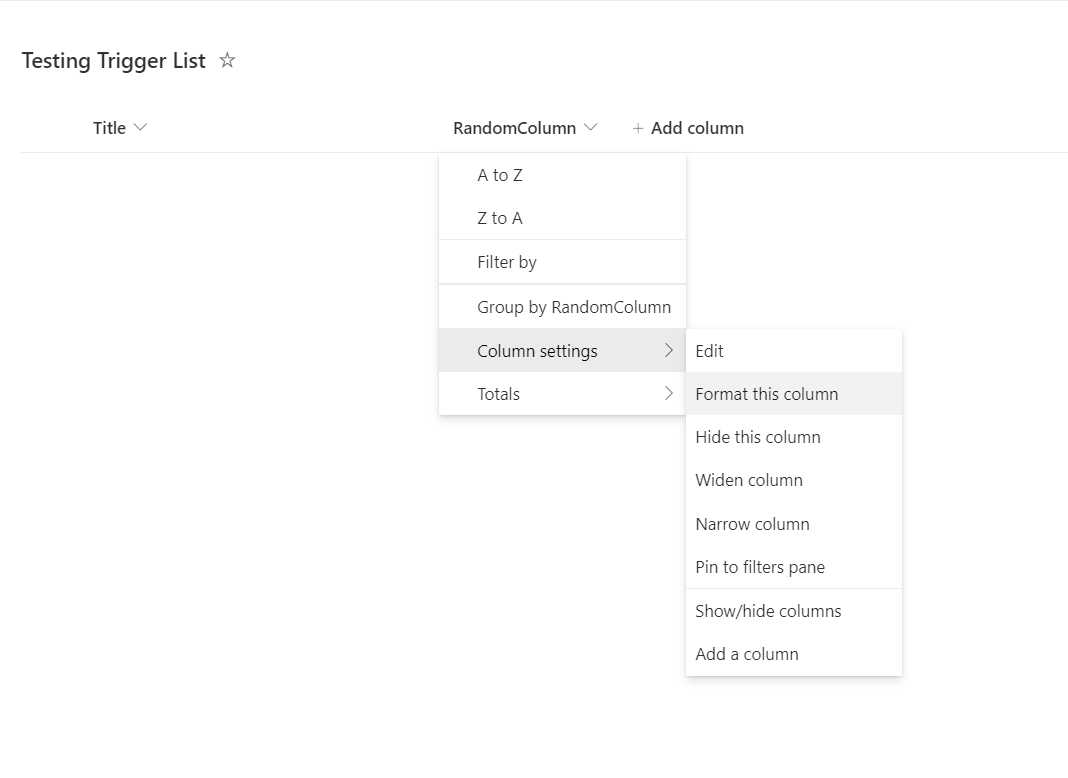
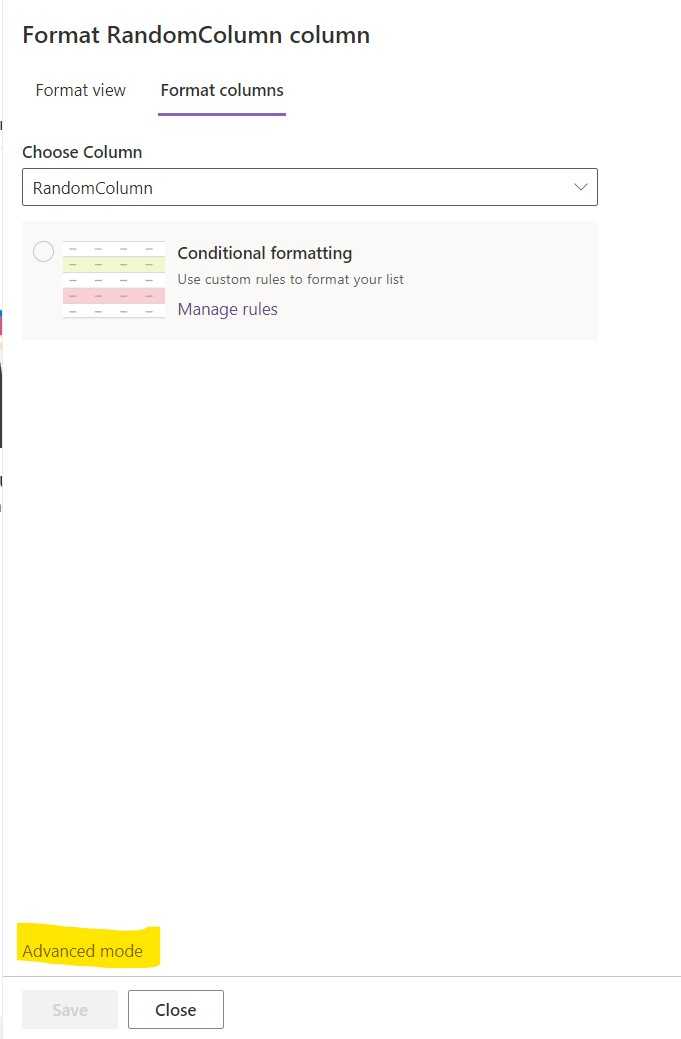
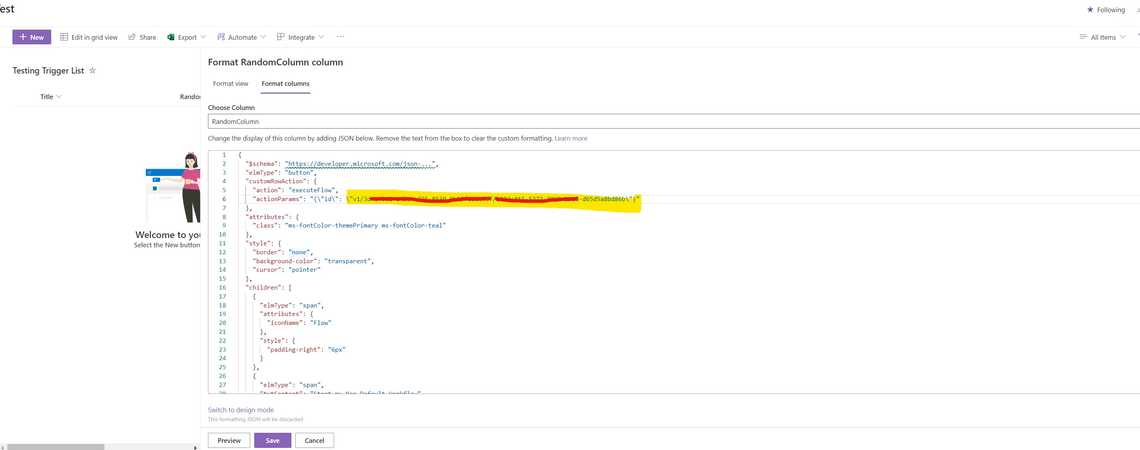
"$schema": "https://developer.microsoft.com/json-schemas/sp/v2/column-formatting.schema.json",
"elmType": "button",
"customRowAction": {
"action": "executeFlow",
"actionParams": "{\"id\": \"[ENTER WORKFLOW IDENTIFIER HERE]\"}"
},
"attributes": {
"class": "ms-fontColor-themePrimary ms-fontColor-teal"
},
"style": {
"border": "none",
"background-color": "transparent",
"cursor": "pointer"
},
"children": [
{
"elmType": "span",
"attributes": {
"iconName": "Flow"
},
"style": {
"padding-right": "6px"
}
},
{
"elmType": "span",
"txtContent": "Start my Non Default Workflow"
}
]
}

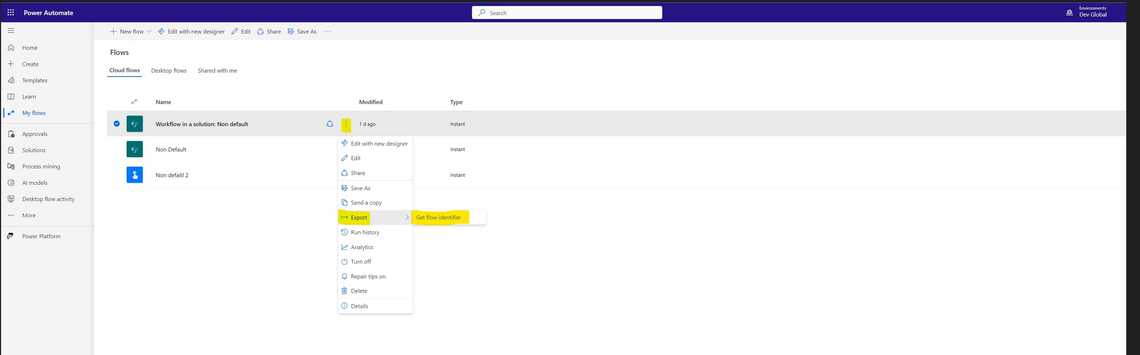
Replace [ENTER WORKFLOW IDENTIFIER HERE] with your own workflow identifier, which you can find on the Power Automate page.

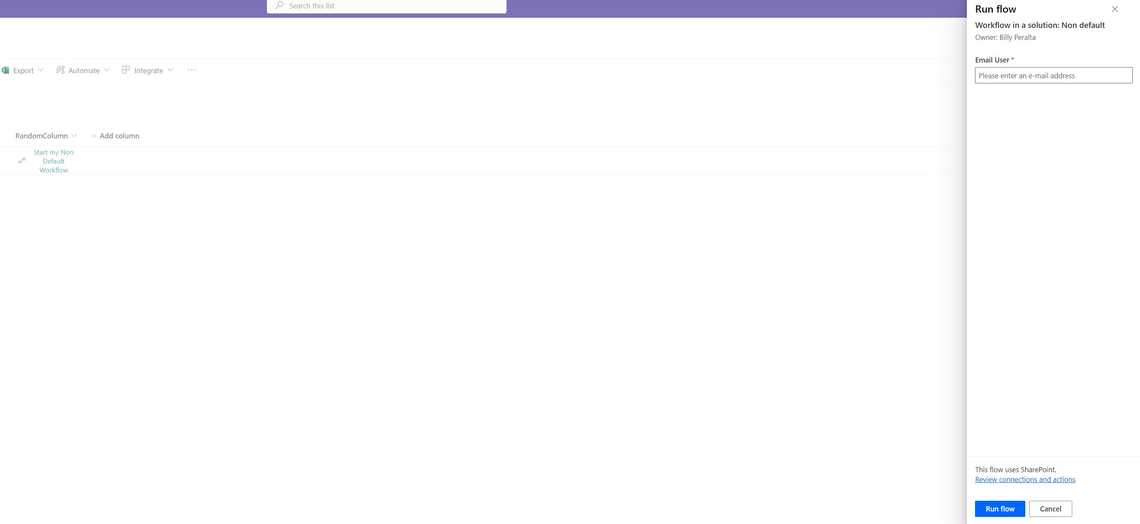
Note: This example uses one of my workflows deployed to my non-default development environment.

Getting the Flow Identifier.

Changing the Format of the Column

  1. Once youve pasted the JSON format, your column should look like this:

How it should look like after formatting.

  1. Dont forget to save your changes and try the workflow. Since the workflow may require an email input, here’s how it should look:

Starting now the workflow.


Tags

O365M365SharePoint OnlinePowerAutomate

Share


Previous Article
Monitor your PowerApps Canvas App to your Azure DevOps Repo

Related Posts

Monitor your PowerApps Canvas App to your Azure DevOps Repo
June 21, 2023
2 min

Quick Links

About MeContact Me

Social Media